Creating a service account
Navigating to Service Account Management
First, log into your Vendasta Partner Account at the Partner Center Login Portal
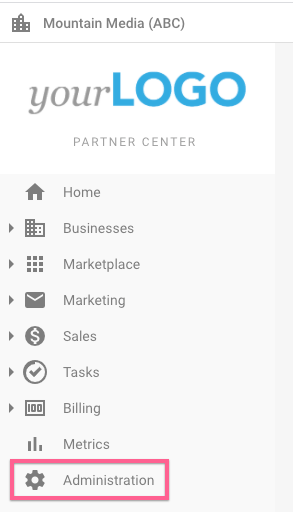
Now proceed to the Administration Panel by clicking the "Administration" link in the left side-panel. If you are unable to see a link to the Administration Panel, please contact your supervisor to obtain the necessary permissions.
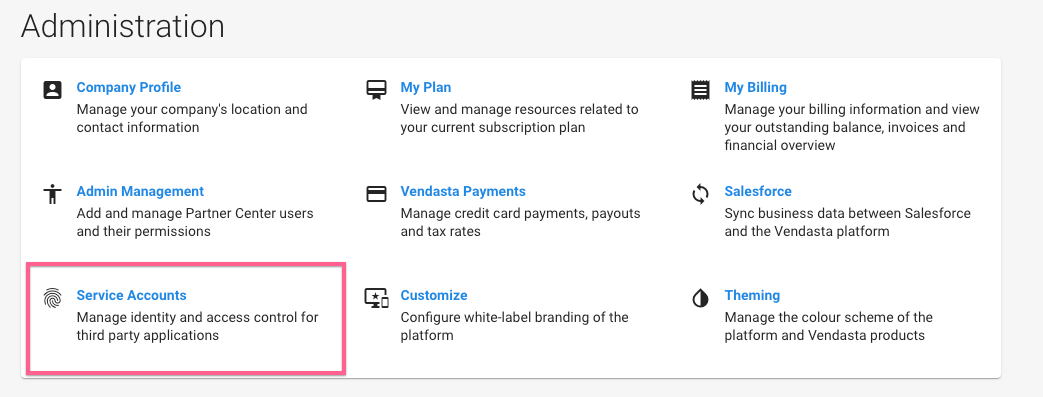
Next, click the link to the "Service Accounts" panel. If you are unable to see this link, please contact your Vendasta representative.
Creating a Service Account
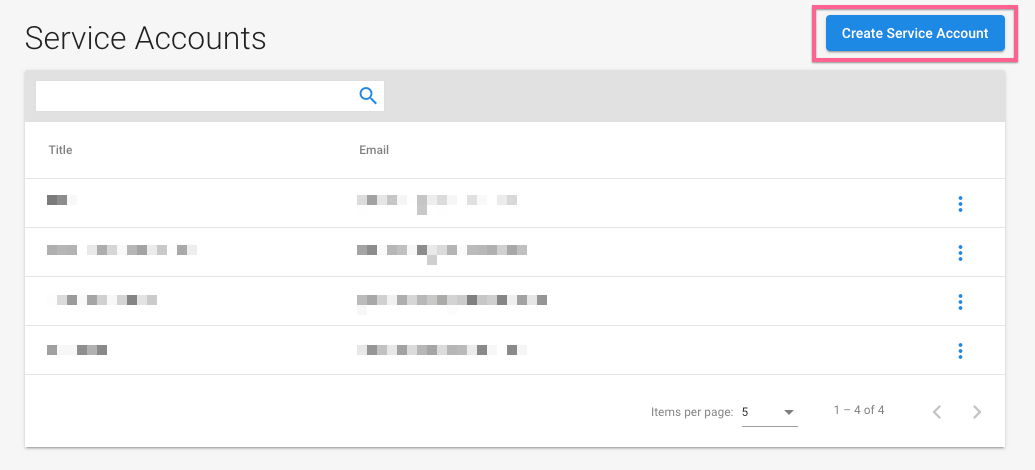
On the Service Accounts Screen, we'll need to create a service account. If you are integrating with an existing service account, you may skip to generating a key pair.
First, click the "Create Service Account" button.
Here you can give the account a title and an ID which will help you to identify the service account in the future. These are primarily for your own benefit, so be as descriptive as you like.
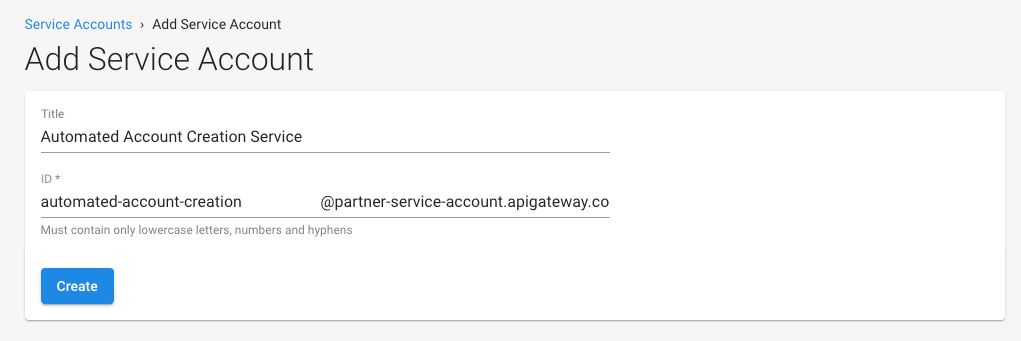
Click the Create button to create the service account and proceed to the Manage Keys screen for the newly created account.
Generating a key pair
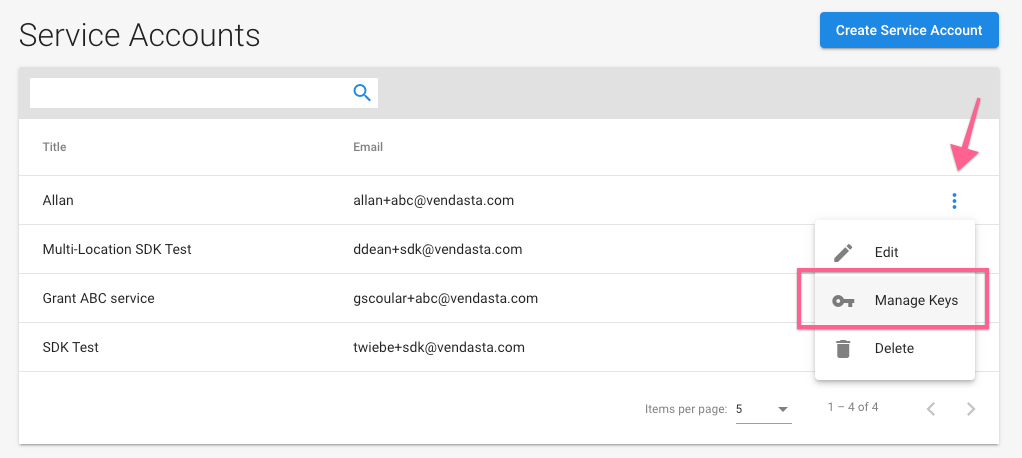
Proceed to the "Manage Keys" screen for the relevant service account, either by creating a service account as per the previous step, or by clicking the "Manage Keys" link in the actions menu for the service account as indicated in the following image:
Now you should see a screen which looks something like the following:

Here's where we'll create a new public/private key-pair for the account.
Here we have a choice between an ES256 Key and a RS256 Key. ES256 is required by some existing Vendasta provided SDKs, however for new integrations we recommend using RS256 keys.
Check the compatibility of your preferred OAuth2 library, but generally we recommend using RS256 since most libraries support it.

Click "Generate" when prompted to download a JSON file containing the key credential.
It's important to keep this file a secret like you would any password. Also note that once downloaded this file is erased from Vendasta's servers and cannot be downloaded again, if the JSON file is lost, a new key pair will need to be generated.
The service account credential JSON file you downloaded should look something like this:
{
  "type": "service_account",
  "private_key_id": "c0273fce-79b7-4104-8a8c-ea489abb3979",
  "private_key": "-----BEGIN RSA PRIVATE KEY-----<private-key>-----END RSA PRIVATE KEY-----\n",
  "client_email": "automated-account-creation@partner-service-account.apigateway.co",
  "token_uri": "https://sso-api-prod.apigateway.co/oauth2/token",
  "assertionHeaderData": {
    "alg": "RS256",
    "kid": "c0273fce-79b7-4104-8a8c-ea489abb3979"
  },
  "assertionPayloadData": {
    "aud": "https://iam-prod.apigateway.co",
    "iss": "automated-account-creation@partner-service-account.apigateway.co",
    "sub": "automated-account-creation@partner-service-account.apigateway.co"
  }
}
Cycling Keys
The public/private keys for a service account can be cycled if for any reason a private key is exposed to the public or is presumed to be compromised. You may also choose to cycle your keys on a regular basis for security purposes.
Service accounts support multiple public/private key pairs for this purpose, follow these steps to cycle your key without downtime:
- Generate a new key pair using the instructions above.
- Replace your existing credential file with the new one.
- Deploy all services to ensure all integrations are now using the new key.
- Delete the old key pair from the "Manage Keys" screen.
You may perform these steps at any time, as often as you like. Note that once deleted from the service account a key pair cannot be recovered.
Next Step: Using a service account