Provisioning Workflow
Product Life Cycle
An activation can be in one of 4 states for any given Account:
*See Activation Types below for details on all possible events
#1 Purchase Event: An order has been approved, either automatically or by an Admin user, which triggers the provisioning event sending the configured purchase alerts for the skus purchased to the Vendor. There are multiple ways an activation could be triggered. It may be triggered by either a Reseller Admin, or a user from an end business. Submitting an order as a Reseller Admin is the easiest way to test the triggering of a Provisioning Event.
#2 Resolve Pending Activation Event: Depending on the sku configuration, either Vendasta, or the Vendor confirms that the product is now active by calling the 'Resolve Pending Activation' endpoint in the Accounts API. This can be accomplished automatically via the API, or via the Vendor Center Accounts page -> Pending Activations sub tab(this is hidden when there are no pending activations).
#3 Cancellation Event: A sku has been canceled for a given Account, and the activation goes into a Pending De-Provisioning State. This can be undone if the user changes their mind. Vendors may optionally subscribe to this event.
#4 Deactivation Event: A de-provison alert is sent to the Vendor.
- If the Product is in a pending de-provision state, then the product is fully deactivated at the end of it's billing cycle.
- If the sku Billing Frequency is set to 'One Time', de-provision event occurs immediately after cancellation event.
Please Note:
- An Add-on can only be active when its parent Product is active.
- When a product is deactivated, all of its Add-ons are automatically deactivated.
Receiving order & provisioning events
Notification of a purchase and the purchase data included in the message may be received by the Vendor via Webhook AND/OR Email. These notifications are triggered when your Product, or Add-on is activated on an Account
Email Notification
Purchase notification emails will always be sent to any recipients configured. You may add as many notification recipients as you like:
Vendor Center -> Product -> Product Info -> Product Activation->Notifications
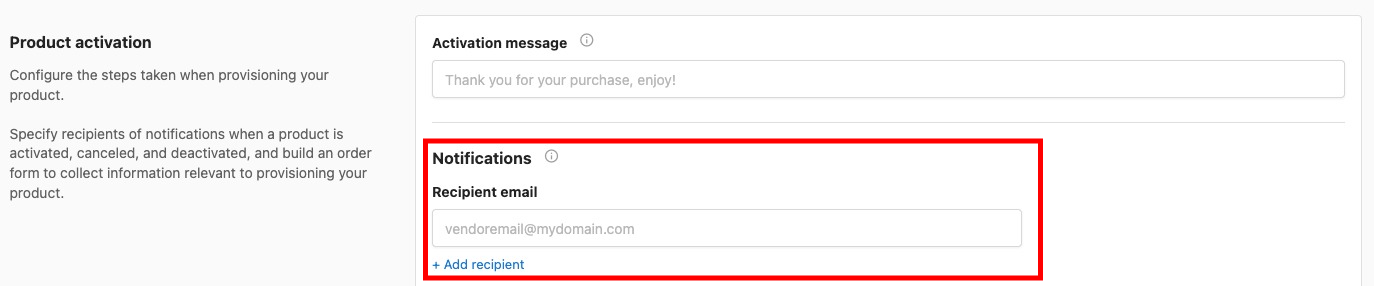
Activation email notifications can be sent in conjunction with the webhooks to keep your team in the loop. If your offering has a dashboard, and you are providing SSO it is not recommended to use email as the sole source of your product provisioning as it is a manual process. The email will contain the order form, but doesn't include all of the Account data that the webhook does.
Webhooks
The Purchase Webhooks will receive the basic data that is available on the Account, as well as the order form data if an order form is configured for the Application.
See the Webhooks Page for details on the payloads.
Configuration
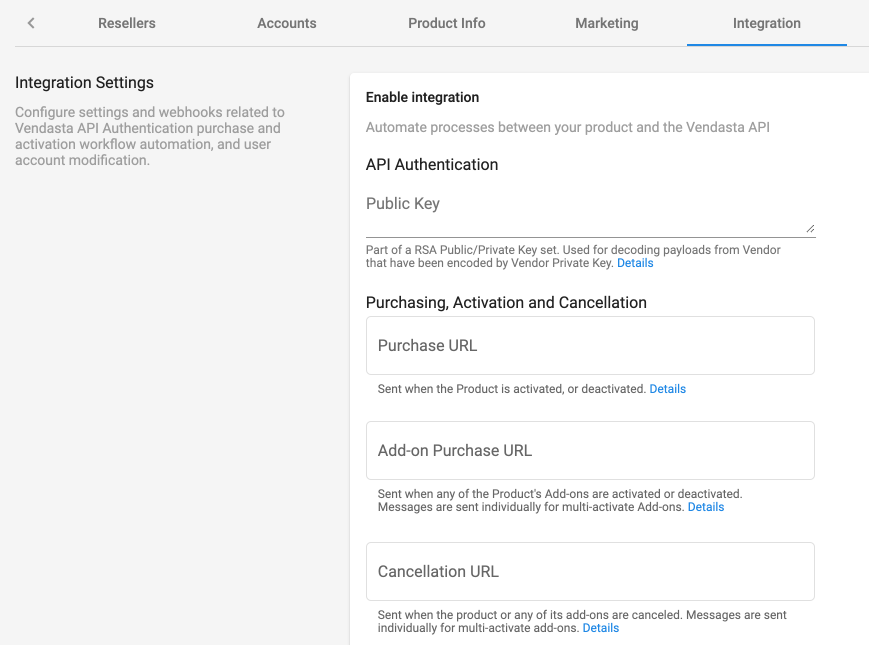
Apps & Add-ons have individual Purchase webhooks. Both of these Webhooks are configured on the Integration page of the Parent App. The Cancellation Webhook is an alert only, and no action is expected based on its optional receipt.
Mapping Accounts
Vendors are responsible for maintaining a mapping between the Vendasta Account, and the equivalent entity on their side.
| Field | Description |
|---|---|
account-->id | This is the unique Vendasta ID representing a Vendasta Account(typically an individual business location). There should be a 1:1 relationship between a Vendasta Account and an instance of the Vendor Product. This field has the key 'id', and is found within the account object in the purchase webhook json payload. Format: AG-XXXXXXXX |
activation_id | This is a unique activation tracking id, it will be required to resolve a Pending Activation. |
order_form_submission_id | This is a unique id for tracking order form data from an Activation. |
Provisioning Workflows
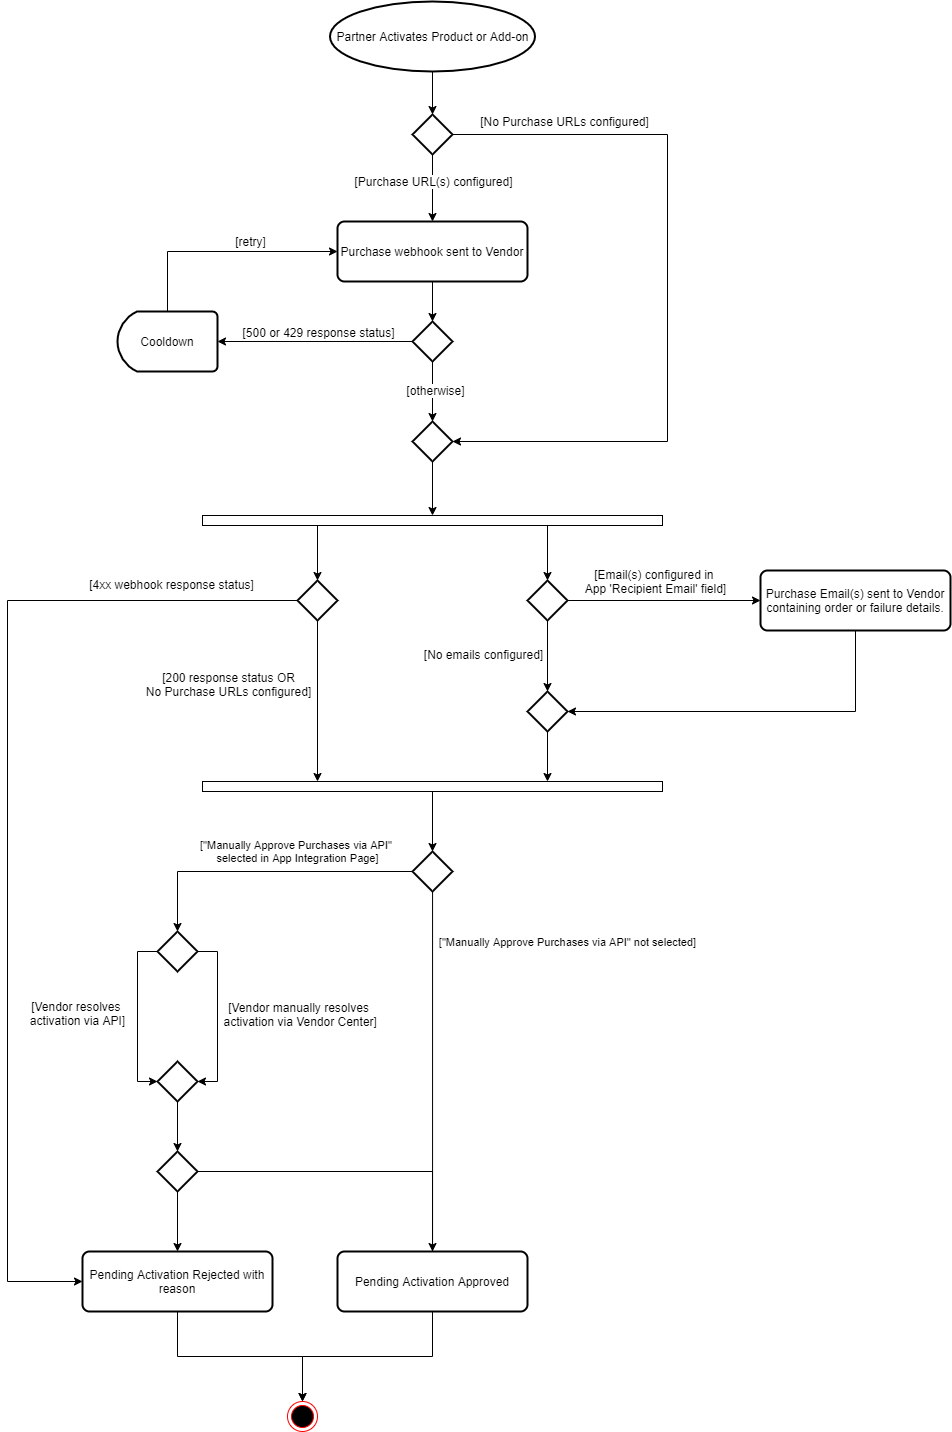
If utilizing webhooks, using the Pending Activation Workflow is recommended. If your operations team has to take manual steps to provision the offering, then this flow is required.
The Use "Pending Activation" workflow checkbox in the Product activation section of the Product Info page shifts the responsibility for activation resolution from Vendasta to the Vendor.
Manual UI Route
- An email with the order details will be sent to all of the email addresses registered in the Notifications --> Recipient Email list.
- Execute whatever steps are needed to provision the product. If you utilize the API or SSO this will involve mapping the
account_idto the equivalent id for your product. - Resolve the pending activation via Vendor Center. Vendor Center -> Product -> Accounts -> Pending accounts. *Note that the Pending accounts subtab only appears when the
Pending Activationworkflow checkbox is selected on the product or one of it's Add-ons.
API Route
- When the webhook is received always respond with a 200 indicating a successful response
- Execute whatever steps are needed to provision product
- Resolve the pending activation via the _Resolve a Pending Activation` API endpoint in the Accounts API.
Full Provisioning Workflow
Testing Provisioning
The action field on the Purchase Webhook indicates which payload type you are receiving.
actions: provision, de-provision, provisioned-trial, change-edition
Note that Add-ons only have the provisioned & de-provisioned actions, as they are not compatible with Editions or Trials.
Development Testing
Mock Webhooks
Once a value has been entered in the Integration-->Integration Settings-->Purchase URLs a testing tab will appear on the far right for sending mock purchase data to your purchase urls. However, if you require order form data to provision your sku, and mock data doesn't suffice you should test the activations from Partner Center. Activation methods are covered below.
Manual Functional Testing - required
Step 1) Publish Product to your Partner Center
Publish your product from the Vendor Center Products page. After Publishing, you're product is still private to you. Making your product visible in the Vendasta Marketplace is controlled by Vendasta, and referred to as 'Distribution'. You won't see your product in Partner Center to activate unless it is published.
Step 2) Create Test Accounts
Products are activated on Accounts, so you must create test Account(s) before you can test product activation. You can create as many Accounts as you want to test within Partner Center.
If you are actively using the platform to sell to your own customers you will want to create a clear naming convention for test accounts. For development it recommended that you create a product per development environment your team deploys to.
Step 3) Test Activation
Activate and deactivate your own offerings as much as you desire. The quick start for this is below - for more detailed information see the help center.
Prior to your products being released they start in 'testing mode'. While in testing mode, when you cancel an activation, the sku will immediately deactivate, rather than waiting until the end of the configured billing term. This means during testing that you could receive the cancellation, and de-provision webhooks within hundredths of a second of one another.
Product or Add-on Activation
There are many ways a sku can be activated. For testing purposes, the easiest method is via the Partner Center Account Details page:
-
Navigate to Partner Center > Businesses > Accounts and click on the account name.
-
Within the Account Details page - select
Order Products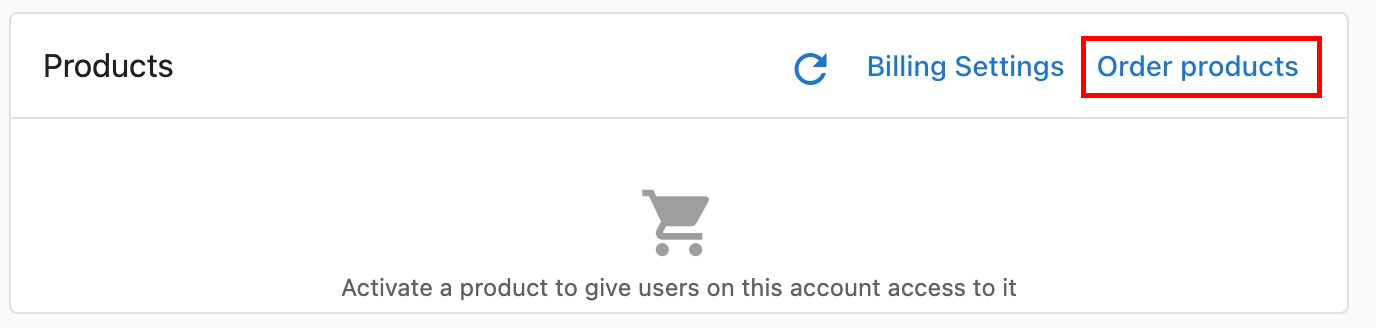
This flow from the Account Details page instantly triggers activation, and request(s) will be sent to their respective purchase webhooks with the provisioned action. If an Order is created in any other fashion, it must go through an approval process - which is less friendly for testing.
Edition Change
The new edition_id will be included in the data for whatever purchase notification is configured.
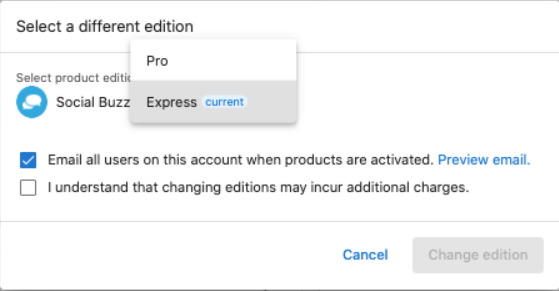 Edition Change from Partner Center
 Account Details Page
Unlike an Activation, an Edition Change can not be rejected at this time. If a 400 error occurs during the Edition Change event, Vendasta and the Vendor will end up out of sync. If this edge case does occur, the Partner and/or Vendor should contact support@vendasta.com
Trial Activation
Trials are currently ONLY activated from within in the Business App.
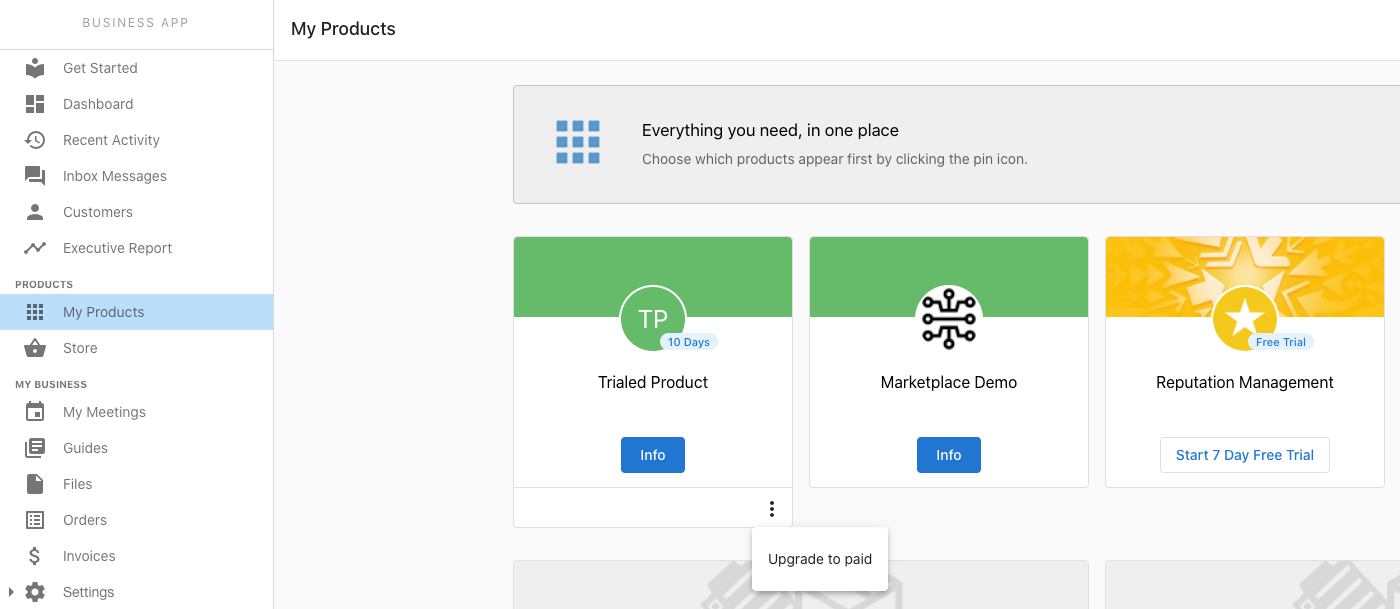 A trial may be upgraded to a paid product or edition via either Business App, or Partner Center.
The Vendor is responsible for the trial lifecycle, including:
- Behavior after the trial ends. The product remains accessible after trial expiry to provide flexibility to the Vendor as to how they want to prompt upgrades.
- Any communications via the Activity Stream with calls to action, informing users of the trials state, when it ends, and encouraging upgrades.
There are two steps to making a trial available to be activated.
- As a Vendor, configure the Trial in Vendor Center. This is configured in the Pricing & Trials section in the Product Info tab.
If your product has editions, let your Vendasta contact know which edition you want to be trialed.
- As a Channel Partner, set the Trial to be available in Business App via Marketplace -> Products -> App -> Product info:
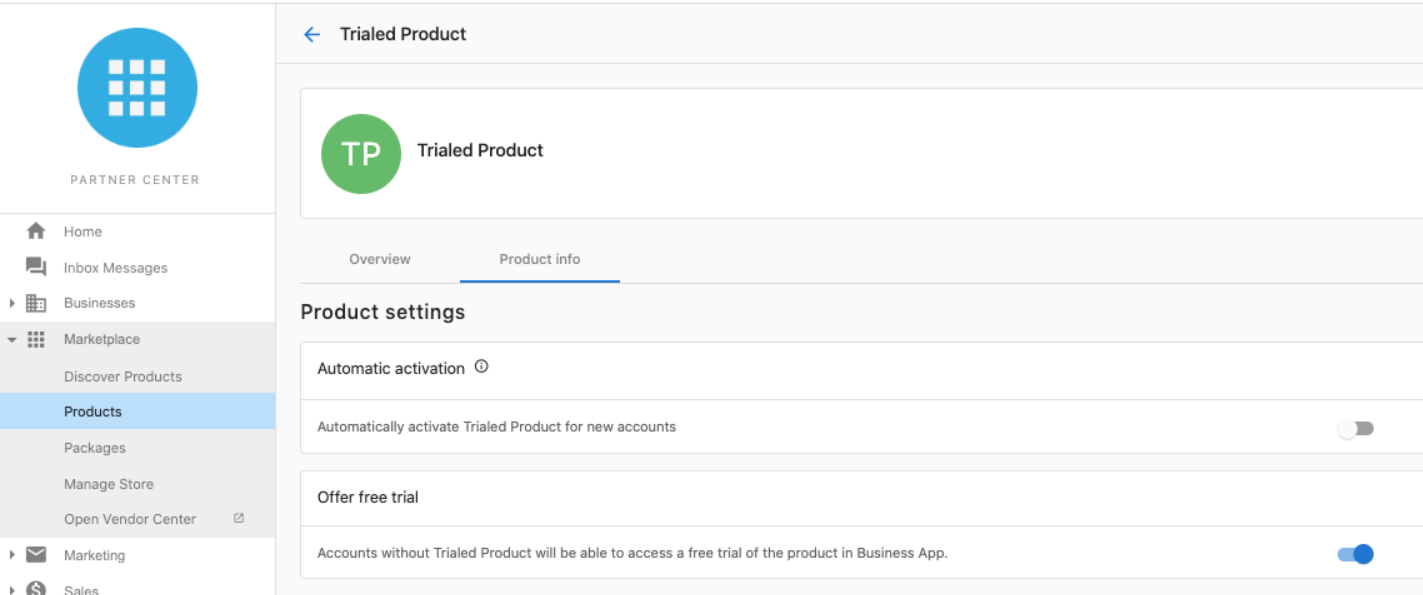
Next: Session Transfer